 |
This month is flying by!!!! I can't keep up. I know they say time goes by faster as you get older, but this year seems a lot faster than most.
As promised... Here is another one of my projects I did last year.
I decided to try a T-shirt quilt! I always say that I'm scared to start new things when kit comes to quilting but now that I did it I'm glad.... and it wasn't as hard as I thought it would be.
I asked my Dad to go through all of his old Harley shirts and pick some out for me... I didn't even tell him how many. To my surprise, he brought me a bag a while later and I was impressed with his selections. He had shirts that I remember him wearing when I was young (maybe 30 years ago). He also had shirts from locations that were important to him. I know that each shirt was special to him and I found out some of them were even worth quite a bit of money. Some were worn thin some were faded and some even had holes from where they hit his belt buckle. I had a few challenges to work on.
 |
| Black on the inside - faded grey on the outside. |
 |
| Just a few little holes. |
I didn't know how I would lay them out so I started by cutting the fronts from the backs and get measurements. I made a list of every shirt and got dimensions for the smallest I could make the block to the largest I could make it. My dad is a tiny guy and some of his old shirts looked extra small. This made it hard for a few of them to make sure I got the entire graphic in the block.
 |
| Extremely faded and loved. |
 |
| I included the backs too - they helped tell the story. |
 |
| Faded and full of holes. |
Next I busted out my graph paper!!! One of my musts when I do a layout. I had to pay attention to color and the picture when I started trying to figure it out.... it took quite a few drafts but I finally got all the shirts to fit with only a few places that needed filler.
 |
| Final draft.... |
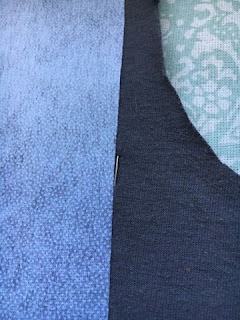
Next I backed them all with Pellon P44F fusible interfacing which I liked because it wasn't too bulky. In order to get the most of my fusible, I cut each piece an inch bigger than my block size and placed it centered over the graphic on the front of the shirt then I put a pin on each edge. I turned the shirt over then lined the fusible up between the pins and ironed. Then I could trim to the size I wanted with minimal waste. The shirts that had holes got a patch from an extra piece of the shirt. It looked fine to me!
 |
| Center the image and pin the sides - then flip the shirt over. |
 |
| Line fusible up between pins and iron down. |
Next I started sewing!!! I backed with a grey Kona cotton and used a warm and cozy batting. Had my amazing long arm quilter add some flames and BAM! Just like that it was done and it came together almost perfectly and I had one super happy dad come Christmas!
 |
| It turned out so nice I almost want one for myself! |
I saw some of the other bloggers doing this so I will too just in case it is proper etiquette.
Linking up with crazy mom quilts --- Thanks for coming!!
