Showing posts with label 2016. Show all posts

Tuesday, January 1, 2019

Christmas Quilt Number 2

Cut and ready to go.
Just a quick post to continue my story from my last post......  After I finished my Christmas quilt so quickly, my sister and I decided to do one for my mother-in-law as well.  We had a feeling that she would say that she just loved our quilts so much and that she had to have one.  We decided to both work on it to get it done fast so we could give it to her for Christmas.  We collected the fabrics got them cut up and organized.  I got to sewing and had it pieced and ready for the long arm quilter in no time.  We decided on a chocolate brown minky for the back.  I turned out perfect!!!

A sample of the colors.
I love Christmas fabrics!
My brain at work - getting the balance right.
Done and on the long arm machine.
Holly leaves for grandma.
So, this quilt was finished in time for 2016.  Grandma loved it!  The thing is.....  We haven't seen it since!!  We made her matching pillows this Christmas and told her that she had to put her quilt out and she could not find it.  Oh boy!!!  The pillows look great though!!!

Pillows done! (This pic was at my house before we gifted them.)
I had my son work on making the pillows from the scraps so that we could tell Grandma that the pillows were made by him.  We didn't want them to disappear too!  Hopefully the quilt will show up at some point!!!  My sister's Christmas quilt has not been made yet.  I may add it to my to do list for 2019.


Happy New Year by the way!!!  Next post will be my yearly recap..... 


"He gives strength to the weary and increases the power of the weak."  Isaiah 40:29


Sunday, December 30, 2018

Christmas Quilts

Cozy…..  exactly what quilts are for!
This Christmas quilt is one of my favorites!  It was finished in 2016, just before Christmas.  My sister and I went to a quilt show in October and fell in love with the group of fabrics.  We picked out enough fat quarters to do two of these one for me and one for her.....  we cut up all the fabric and divvied it up.  I got started right away - the pattern from MSQC called 4 Patch Lattice  used a basic four patch pattern so I started by laying all of my groups of four out.  This is where things got hard for me.  I definitely have issues with making sure that the colors are perfect and that the patterns are perfect - there must be balance.

Four patches ready to sew.
Once I got all the four patches to look perfect I had to cut them all in half diagonally and then lay it out again.  This messed with the balance again and took me forever to get right.  This next picture is half of the quilt laid out on the table - I had to stand on a chair with the phone in the air as high as I could reach!  I definitely have issues!!!

Half laid out.
Triangles ready to sew!
Sashed and ready!
Somehow I managed to keep them all straight and did not mix them up too much.  I got the balance that I wanted!

On the long arm machine!!
Snowflakes on the Minky!!!  Love love love!!
I am in love with this quilt!
Bound with minky!
My precious little squishy dog!  
How things are supposed to be!  
This last picture makes me sooooo happy!!  I am under that quilt, watching TV with a squishy little lovey dog and a fluffy kitty cuddled up and happy!

In the next post I will explain how this amazing Christmas quilt ended up stressing me out and how I got myself into trouble and ended up making a second one before Christmas.


"Take delight in the Lord, and he will give you the desires of your heart."  Psalm 37:4


Friday, March 24, 2017

Harley Quilt for Dad


This month is flying by!!!!  I can't keep up. I know they say time goes by faster as you get older, but this year seems a lot faster than most. 

As promised...  Here is another one of my projects I did last year. 

I decided to try a T-shirt quilt!  I always say that I'm scared to start new things when kit comes to quilting but now that I did it I'm glad....  and it wasn't as hard as I thought it would be.  

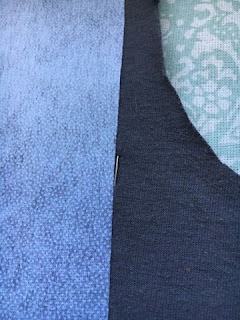
I asked my Dad to go through all of his old Harley shirts and pick some out for me...  I didn't even tell him how many.  To my surprise, he brought me a bag a while later and I was impressed with his selections.  He had shirts that I remember him wearing when I was young (maybe 30 years ago). He also had shirts from locations that were important to him. I know that each shirt was special to him and I found out some of them were even worth quite a bit of money. Some were worn thin some were faded and some even had holes from where they hit his belt buckle.  I had a few challenges to work on.  

Black on the inside - faded grey on the outside.
Just a few little holes.

I didn't know how I would lay them out so I started by cutting the fronts from the backs and get measurements. I made a list of every shirt and got dimensions for the smallest I could make the block to the largest I could make it. My dad is a tiny guy and some of his old shirts looked extra small. This made it hard for a few of them to make sure I got the entire graphic in the block.  

Extremely faded and loved.

I included the backs too - they helped tell the story.
Faded and full of holes.

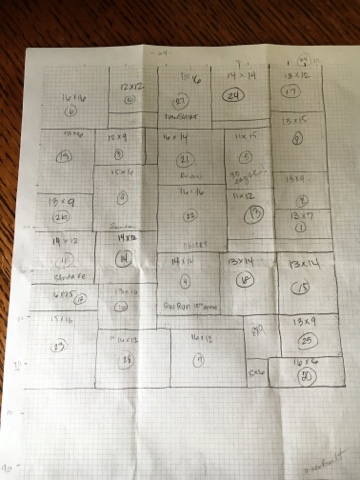
Next I busted out my graph paper!!!  One of my musts when I do a layout.  I had to pay attention to color and the picture when I started trying to figure it out....  it took quite a few drafts but I finally got all the shirts to fit with only a few places that needed filler.  

Final draft....

Next I backed them all with Pellon P44F fusible interfacing which I liked because it wasn't too bulky. In order to get the most of my fusible, I cut each piece an inch bigger than my block size and placed it centered over the graphic on the front of the shirt then I put a pin on each edge. I turned the shirt over then lined the fusible up between the pins and ironed.  Then I could trim to the size I wanted with minimal waste.  The shirts that had holes got a patch from an extra piece of the shirt. It looked fine to me!


Center the image and pin the sides - then flip the shirt over.
Line fusible up between pins and iron down.

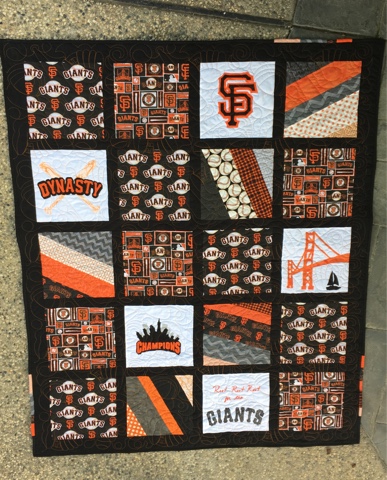
Next I started sewing!!!  I backed with a grey Kona cotton and used a warm and cozy batting. Had my amazing long arm quilter add some flames and BAM!  Just like that it was done and it came together almost perfectly and I had one super happy dad come Christmas!

It turned out so nice I almost want one for myself!


I saw some of the other bloggers doing this so I will too just in case it is proper etiquette. 
Linking up with crazy mom quilts ---  Thanks for coming!!

PS.....  Does anyone know how to make the huge space at the top go away???  I hate it!!!


Friday, February 3, 2017

Giants!!

As promised....  this is one of my favorite quilts of 2016!  Looking back at the pictures I realized that I started this in 2015.....  how does the time go by so fast???

I decided to do this Giants quilt for friends that were expecting a baby boy. I had to think out of the box for this one because I know that they would have a picture perfect nursery that looked like it should be in a magazine. Sports was something I knew they loved and I figured this way the quilt would be keep around for awhile.  Since it's been so long now I don't remember what made me get so creative with the appliqué blocks.... but I'm glad I did. 


Designing ---  tools of the trade!

Close up of the stitching.


I love my fancy labels!!!

Finished front.

Finished back.

I loved this quilt so much I decided to use the extra blocks to make myself one.  I want it a bit bigger tho.  And since it took Melanie longer to quilt it because of the appliqué on the back-- I will use a solid piece for the back of mine. 😊  The one for me is on my list to complete this year.  I hope by the end of the season!!!


Spring training starts in just a couple weeks!!!