Friday, January 5, 2018

It's Another New Year

My favorite quote!
Amazingly, another year has gone by.  I knew that I set a lot of goals last year so I figured I better look back and see how my year went.  I knew that I didn't hit the goals that I set, but I thought that I did a bit better than I did.  As much as I love my Mary Poppins quote, I am definitely not perfect.

Number 1 and 2....  My first two goals were only half met.  I posted two of the four quilts that I made in 2016.  I really need to post the last two.  And I did not meet my goal of making more than four quilts in 2017.  I will get to that when I set my new goals for 2018.

Number 3....  As far as my clutter goal goes, it was worked on but still needs work!  This one may be a goal that will never be met as I have issues with getting rid of things.  And every time I think I have made progress my husband finds more boxes for me to unpack.  Overall I feel like I am still better than I used to be.

Number 4....  I did horrible at going to the gym.  I don't think I went at all!!!  I officially cancelled my membership in November.  The good news is that I am pretty sure my weight stayed the same - no gain is a good thing!  We have invested in a new elliptical type machine for the new year so we will see how that goes.

Number 5....  We went out and did archery a few times.  Not as often as I like but still something that I enjoy.

Number 6....  I did alright on this one.  I think...  I have been a bit better at cooking and keeping the house clean.  I just wish I was better at it.  Cooking is definitely NOT my gift.

Number 7....  Not too bad!  I had 8 posts in 2017.  Better than other years!!!  And the fact that I have plenty to post about is good!!  I just need to make the time.

Number 8....  I will never be good enough at this one!  I will have to continue working on a plan to get better at this one.

So....  goals for 2018:

Number 1....  Finish posting the quilts that are complete!  Catch up from last year and don't get behind with this years!!

Number 2....  Meet the goals of finishing quilts!!!  My mom and sister both surpassed my goal of 5 for the year.  And I know that they will again next year!  I just don't set enough time aside for myself.  I have plans for way too many!!  I have cut fabric and started several projects last year and the year before.  I need to finish some of these!!  Pics below.

Number 3....  Get to working out!!

Number 4....  Continue cooking, and start taking lunch more often instead of eating out all the time.  At least 2-3 of the days.

Number 5....  Be a better hostess.  Starting with the superbowl party.  Plan and cook without complaining!!  LOL!  I don't know if I can do this one....  but that is what goals are for!!!

Started in 2015 - Still not done!

Started in 2017 - Top is done - just needs to be finished.

Cut and ready to sew!

Half way done with cutting!  For my favorite Auntie!

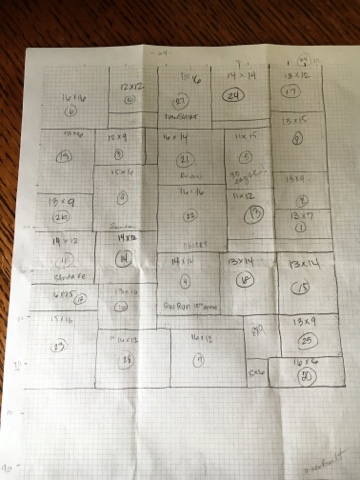
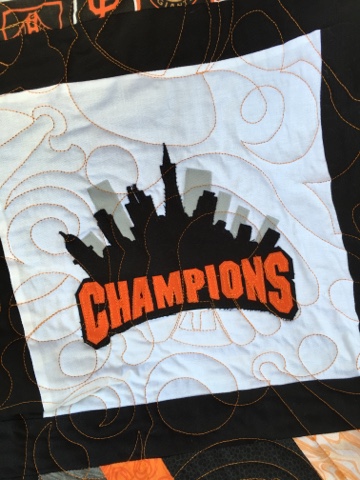
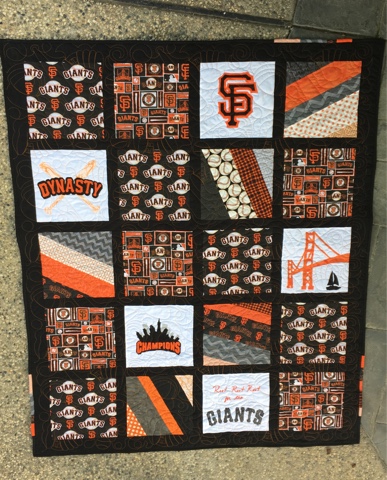
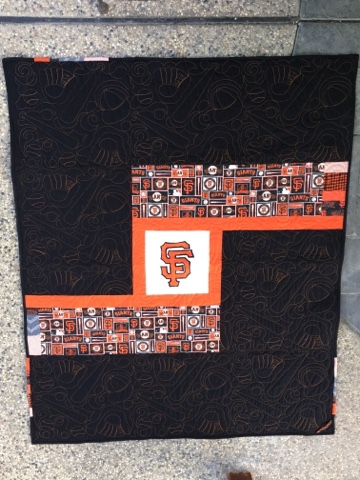
Challenge quilt still not finished.

Not cut yet but getting ready for my favorite uncle!

This is fabric for one of my most ambitious quilts to be done this year.

Dear friends, since God so loved us, we also ought to love one another.  No one has ever seen God; but if we love one another, god lives in us and his love is made complete in us.   -1 John 4:11-12


Sunday, December 31, 2017

Fall Fancy - Finally Finished


Fall isn't over yet.....  I am counting this quilt as finished in time!  Even though Thanksgiving is next week!!!!  I put this quilt together after starting the challenge with my mom.....  For some reason, I decided that a bag full of scraps that was handed from person to person to person was more important than the challenge quilt that I started in the first place.


The funny thing was that I didn't even like the fabrics.  I put this together and got it to my longarm quilter almost immediately and she was full of complements as always and made me feel like I am an amazing quilter (hee hee hee).


I decided that I would keep this quilt that I would call Fall Fancy!  I started on the binding and got tired of having a quilt on my lap so I put it away and kind of forgot about it til it was almost too late.  I finally got around to packing up my little bag of goodies and taking it to my son's judo practice and it only took me two nights to put the last of the binding on.  I get to enjoy this Fall Fancy quilt for another week before I put is away and break out the Christmas quilt that I have yet to post about!!!


So....  I typed this all up and then totally forgot to post it!  Oops!!!  Better late than never!!

Tuesday, October 24, 2017

Summertime's Over

My niece and I comparing toes.
I have decided that I sew a lot more during the colder months!  The weather in the Bay Area takes a lot longer to change.... It's supposed to be 92 here in San Jose today.  I can't believe that summertime is over already - even though it's still hot outside!  I look back and wonder where the time has gone. 

I haven't done well on keeping my goals so far this year.  I am hoping to finish at least one more quilt before the end of the year and maybe even some pillows to match the Christmas quilts that I finished last year and have yet to post about!  I keep thinking that if I write my goals down, that I will accomplish more.  I am thinking that it doesn't really work! 

Till I log in again.....


Romans 3:23-24   "...for all have sinned and fall short of the glory of God, and all are justified freely by his grace through the redemption that came by Christ Jesus."

Friday, May 12, 2017

Finding Joy

Finding Joy - Thread Catcher

I wish my picture was as awesome as the Lillyella one!
Let me start with a quick brag on my sister-in-law (sil)....  she is one of the most unselfish people I know.  She has made sacrifices that people cannot comprehend. She has lived most of the past two decades in a place that few will ever understand. It was all for others with no personal gain. Last year marked a new start for her and I can't say how happy I am to see her full of life!  It reminds me of a butterfly....  waiting patiently until the perfect time to come out of the cocoon. 

Recently, on Facebook, I saw someone post about making a mat to go under their machine...  the picture showed a mat with an amazing paper pieced butterfly and a thread catcher.  My sil has been asking me to make her a thread catcher for at least two years so when I saw this post I knew I had to do this one!!!  I did some research and finally found that it was a free design from lilly ella and it was amazing. I decided to learn how to paper piece!!  Not as easy as I thought!!  

Everything complete.

While I did all my research on Pinterest I found a few other pieces that I thought would be perfect...  I decided to do a small mat for her to use while she sat and did her embroidery on the couch...  I kept the butterfly theme and figured the thread catcher could just be moved from the large mat to the small couch one.  I also decided to do a stopper for the foot pedal of the sewing machine (even if it doesn't get used).  

It took me a while to decide on colors and such but I love the way it turned out!!!  

The perfect label used as a pocket.
My paper pieced butterfly!!

My try at the selvage pocket.
The actual thread catcher.

Couch mat with pockets and pin cushion.
I added some shelf liner so it won't slide.

I am blessed to have a sil that will cater an entire church event for hundreds of people or bake cupcakes for a bridal shower of someone she doesn't even know or make cookies for a bake sale or pick up my kid at the last minute and even feed him....  I could go on with this list for awhile!!!  I know that she is not thanked enough for everything she does and I hope that every time she sticks a thread into that thread catcher she remembers just how amazing she is and just how very important the simple things that she does are. 

Keep pushing through and make every year greater than the last!!

Consider it pure joy, my brothers and sisters, whenever you face trials of many kinds, because you know that the testing of your faith produces perseverance. (James 1:2 NIV)

Linking up with crazy mom quilts


P.S. --  I still can't figure out how to get rid of the space on top!  Sorry.

Friday, March 24, 2017

Harley Quilt for Dad


This month is flying by!!!!  I can't keep up. I know they say time goes by faster as you get older, but this year seems a lot faster than most. 

As promised...  Here is another one of my projects I did last year. 

I decided to try a T-shirt quilt!  I always say that I'm scared to start new things when kit comes to quilting but now that I did it I'm glad....  and it wasn't as hard as I thought it would be.  

I asked my Dad to go through all of his old Harley shirts and pick some out for me...  I didn't even tell him how many.  To my surprise, he brought me a bag a while later and I was impressed with his selections.  He had shirts that I remember him wearing when I was young (maybe 30 years ago). He also had shirts from locations that were important to him. I know that each shirt was special to him and I found out some of them were even worth quite a bit of money. Some were worn thin some were faded and some even had holes from where they hit his belt buckle.  I had a few challenges to work on.  

Black on the inside - faded grey on the outside.
Just a few little holes.

I didn't know how I would lay them out so I started by cutting the fronts from the backs and get measurements. I made a list of every shirt and got dimensions for the smallest I could make the block to the largest I could make it. My dad is a tiny guy and some of his old shirts looked extra small. This made it hard for a few of them to make sure I got the entire graphic in the block.  

Extremely faded and loved.

I included the backs too - they helped tell the story.
Faded and full of holes.

Next I busted out my graph paper!!!  One of my musts when I do a layout.  I had to pay attention to color and the picture when I started trying to figure it out....  it took quite a few drafts but I finally got all the shirts to fit with only a few places that needed filler.  

Final draft....

Next I backed them all with Pellon P44F fusible interfacing which I liked because it wasn't too bulky. In order to get the most of my fusible, I cut each piece an inch bigger than my block size and placed it centered over the graphic on the front of the shirt then I put a pin on each edge. I turned the shirt over then lined the fusible up between the pins and ironed.  Then I could trim to the size I wanted with minimal waste.  The shirts that had holes got a patch from an extra piece of the shirt. It looked fine to me!


Center the image and pin the sides - then flip the shirt over.
Line fusible up between pins and iron down.

Next I started sewing!!!  I backed with a grey Kona cotton and used a warm and cozy batting. Had my amazing long arm quilter add some flames and BAM!  Just like that it was done and it came together almost perfectly and I had one super happy dad come Christmas!

It turned out so nice I almost want one for myself!


I saw some of the other bloggers doing this so I will too just in case it is proper etiquette. 
Linking up with crazy mom quilts ---  Thanks for coming!!

PS.....  Does anyone know how to make the huge space at the top go away???  I hate it!!!


Sunday, February 26, 2017

Challenge Block

Ok....  So my mom decided that she was going to do her first quilt and I couldn't be more excited to help her out.  Only thing is that she decided to do a challenge quilt that is full of triangles which I have not done many of and I do not consider myself very good at them.  

The quilt is by NQC Quilt Block Challenge.  It is a nine week challenge and it's free. 

There is a huge Facebook community working on this quilt and TONS of people to help.  I decided to cover a couple things that new quilters may not know.

First tip is to buy good fabric - I admit that part of the fabric I am using from my stash in this quilt is from Joann's and is not the greatest.  I prefer not to use the Joann's brands in my quilts that I give away or ones that I want to last forever.  I will try to buy my Kona's there - 60% off is the best time!  The other thing is that it does not press well.  You can see in the pic below that even though I ironed and steamed there are still wrinkles.

Next thing is to line up the fabric and start with clean edges.  I prefer to line up along the top fold and then move my ruler to the left as I make the cuts.  Measure twice and cut once.  

Make sure you always hold the ruler down firmly so the fabric and the ruler stay in place.  As you go make sure you cut off all the selvage.  You don't want it to end up in the quilt!

Lining up the fabric to start cutting.
Next tip is to only use pins when doing diagonals.  Once pin on either side to keep the fabric from moving as the diagonal is sewed.  I use them for making triangles and when I am prepping my binding.  There isn't really a need for them any other time.

Use pencil on the lighter fabric to draw lines.

My next reminder for quilting is that there is no need to backstitch.  Just make sure you start and finish as close to the edge as possible.  Another is to use a 1/4 inch foot if possible.  They are not too expensive and you can use 40% off coupons on them!  I even leave my 1/4 inch foot on when I sew the triangles.  It keeps it a bit straighter and more accurate than the regular foot.

Perfect 1/4 inch on both sides.
Always press your seems to one side - to the dark side - that way if you have a darker fabric next to a light one the darker fabric does not show through.  I follow this rule almost always.  If I am doing squares that I want to nest seams I will press the direction I want it to go no matter the color.  

So this next one seems weird but does help......  You want to make sure that as you are sewing your blocks together the seams stay flat.  Flat seams  will ensure that your quilt is nice and smooth.  Watch the ones on top as well as the ones on the bottom as you sew.

Flat seams.
One of the hardest things it to get the seams to match up.  part of this is because as the seams come together the become more and more bulky and do not stay lined up correctly as you sew them.  I do not know how to fix this problem yet....  Sorry!! 

I always say that as long as you don't have to trim off so much fabric that your quilt looks lopsided or as long as you don't have to add a strip to make it bigger you didn't do to bad!  

Not perfect, but it will do the trick.
Again this is a challenge quilt from National Quilters Circle.  It's a free challenge and I did put a link above to the first block.  Good luck!!


Friday, February 3, 2017

Giants!!

As promised....  this is one of my favorite quilts of 2016!  Looking back at the pictures I realized that I started this in 2015.....  how does the time go by so fast???

I decided to do this Giants quilt for friends that were expecting a baby boy. I had to think out of the box for this one because I know that they would have a picture perfect nursery that looked like it should be in a magazine. Sports was something I knew they loved and I figured this way the quilt would be keep around for awhile.  Since it's been so long now I don't remember what made me get so creative with the appliqué blocks.... but I'm glad I did. 


Designing ---  tools of the trade!

Close up of the stitching.


I love my fancy labels!!!

Finished front.

Finished back.

I loved this quilt so much I decided to use the extra blocks to make myself one.  I want it a bit bigger tho.  And since it took Melanie longer to quilt it because of the appliqué on the back-- I will use a solid piece for the back of mine. 😊  The one for me is on my list to complete this year.  I hope by the end of the season!!!


Spring training starts in just a couple weeks!!!